Host Hexo on Cloudflare/ESA Pages
Introduction
In the world of modern web development, Cloudflare Pages and ESA Pages (Alibaba Cloud) have emerged as two of the most reliable platforms for deploying static sites like Hexo. Both services leverage “Jamstack” architecture, allowing you to host your blog without the overhead of managing a traditional virtual private server (VPS).
- Global Speed: It utilizes Cloudflare’s massive edge network to serve your content from the nearest data center to your visitor.
- Developer Experience: It features seamless “Git-to-deployment” automation—simply push your code to GitHub or GitLab, and Cloudflare/Aliyun handles the rest.
- Security: Every site comes with enterprise-grade DDoS protection and automatic SSL by default.
Whether you prioritize a global reach or a localized performance edge, this tutorial will guide you through the nuances of deploying your Hexo blog on both platforms.
Getting Started
- Install Hexo locally by following the guide on the official website: https://hexo.io/
- Push your locally modified blog source code to a GitHub repository. Make sure to remember the repository name and the branch where your source code is stored. In this tutorial, I am using:
- Repository:
blog - Branch:
Hexo-Next
- Repository:
Cloudflare Pages
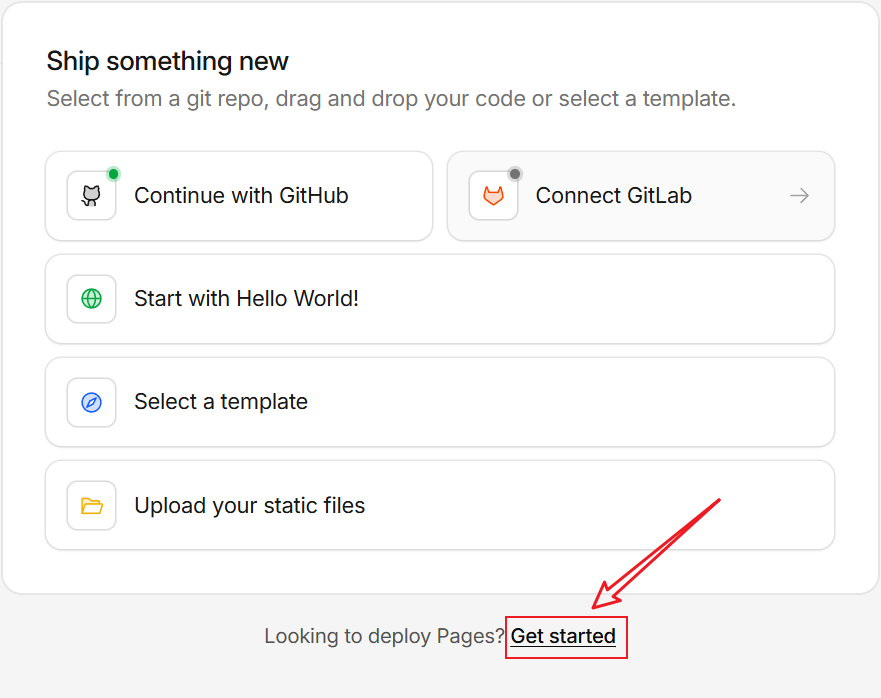
Log in to the Cloudflare Dashboard. Navigate to Compute & AI > Workers & Pages, then click Create application.
On the next screen, click the link at the bottom:
On the next page, select “Import an existing Git repository”, then choose the repository where your Hexo blog source code is stored.
Next, configure the build settings on the “Set up builds and deployments” page. Enter the following parameters and leave the rest as default. Then, click the Save and Deploy button.
1 | Project name: <Your Project Name> |
Finally, when the build process is complete, you will be able to access your Hexo blog via the provided Cloudflare Pages subdomain. You can also bind a custom domain to your project later for a more professional look.
ESA Pages
Access the ESA Pages dashboard (https://esa.console.aliyun.com/edge/pages/list). Click “Create” to enter the Create Function page. Select “Import from GitHub Repo”, and then choose the repository where your Hexo blog source code is stored.
Click Next to proceed to the Configure page. Please refer to the configuration below for specific parameters; leave all other settings at their default.
1 | Prod: <Your Production branch> |
Then, click Start Deploy. After the build is complete, you can add your own Custom Domains on the Domain Names page. (Please note that an ICP Filing/License is required for domains hosted on Aliyun).
Traffic Splitting
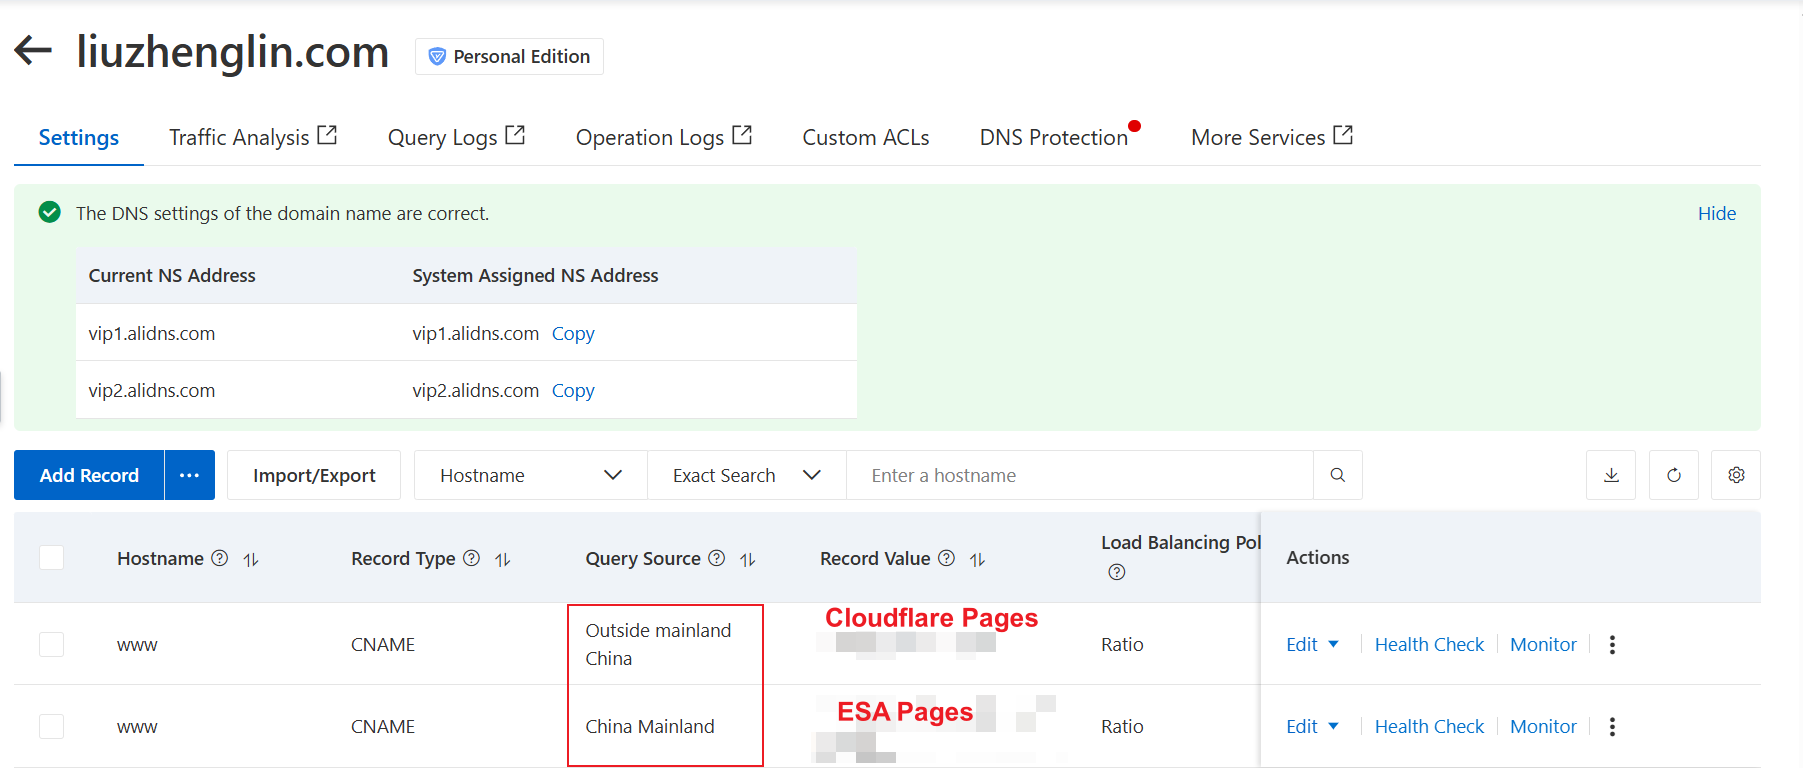
Set up the custom domain www.liuzhenglin.com on both Cloudflare Pages and ESA Pages. Then, use Alibaba Cloud DNS to configure CNAME regional routing for the subdomain: pointing international traffic to Cloudflare Pages and China mainland traffic to ESA Pages.
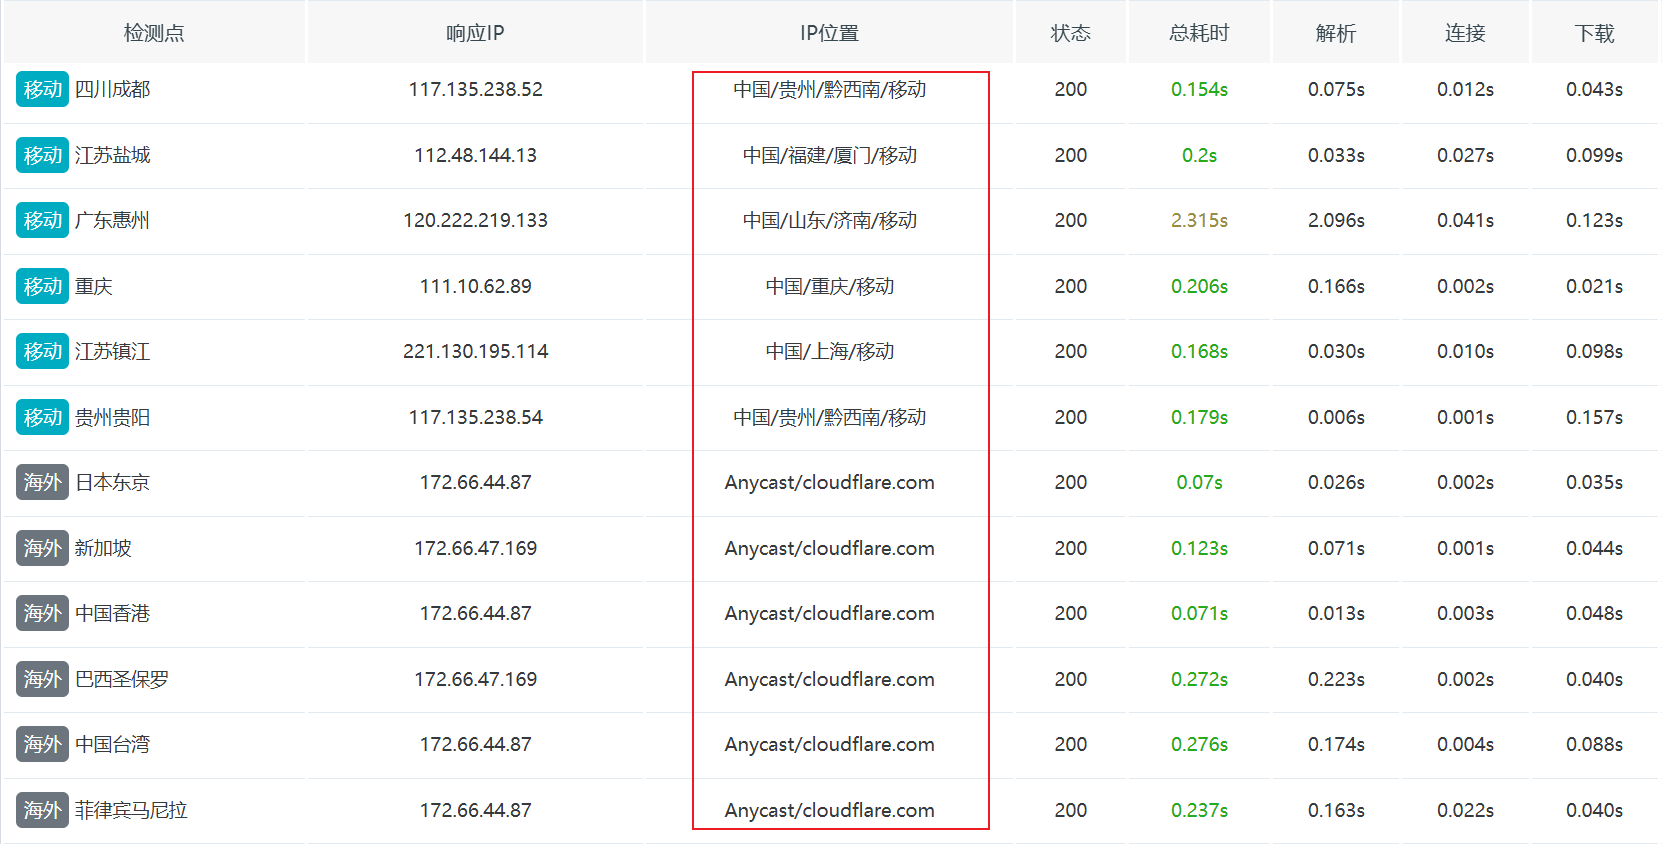
Run an HTTP speed test on www.liuzhenglin.com via ITDOG, and you will see that traffic splitting for mainland China and international regions is successfully implemented.
Important Notes
- Static assets (images, CSS, JS, etc.) should avoid spaces, special characters (e.g., &, %, ?), and excessive length.